Perfect LED TV Picture: The 7-Step Setup Guide for Stunning Viewing
Published: 30 Oct 2025
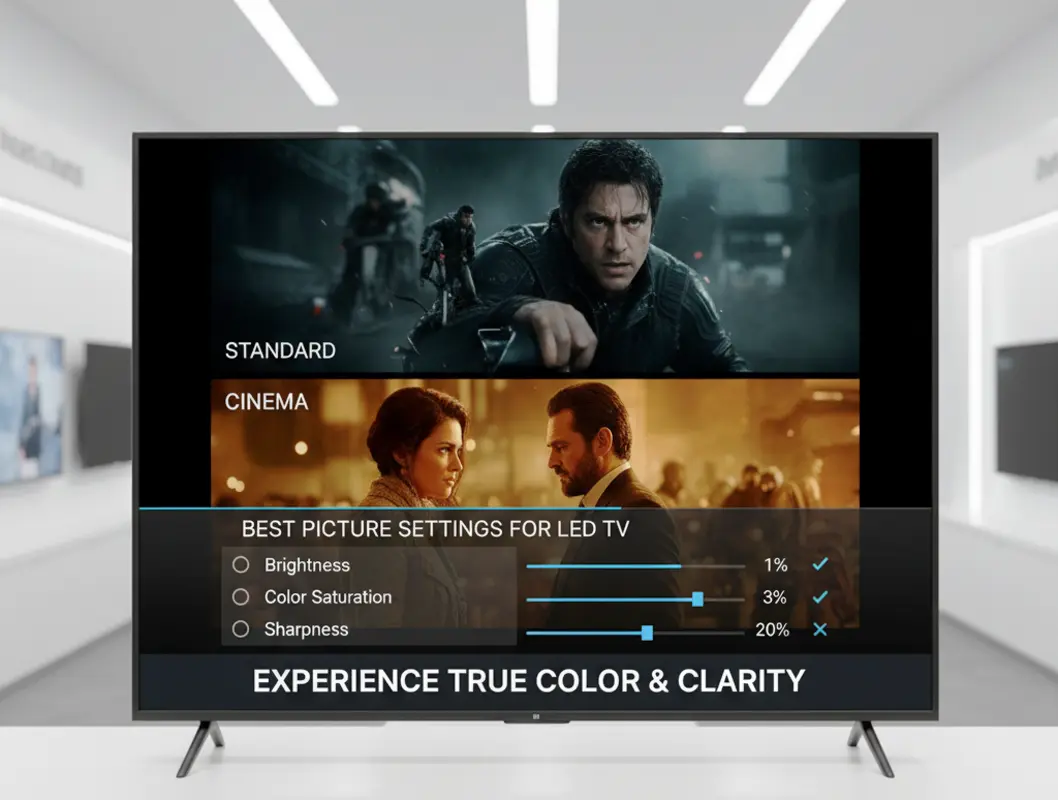
Perfect LED TV Picture
You finally got that beautiful new LED TV, but the picture doesn’t quite look like the stunning display you saw in the store. Faces look a bit orange, dark scenes are murky, and sports have a weird, too-smooth “soap opera” effect. This is where finding the best picture settings for your LED TV becomes essential. It’s not the same as just turning up the “sharpness” or selecting “Vivid” mode—in fact, those often make the picture worse. Think of it like tuning a musical instrument: while anyone can make noise, proper calibration creates beautiful music. Our guide helps you tune your TV to perfection, transforming it from a simple screen into a window to another world.
Getting Ready to Calibrate Your Perfect LED TV Picture
Before we start changing settings, a little preparation will make the process smooth and effective.
- You need to create the right environment for adjusting your TV, because room lighting dramatically affects how the picture looks.
- It’s important to gather the right tools before starting, so you don’t have to search for things in the middle of the process.
- You should understand your goal, which is creating a picture that looks natural and pleasing to your eyes for everyday viewing.
What You’ll Need Before Starting
• Your TV Remote Control
This might seem obvious, but make sure you have it handy and the batteries are working.
You’ll be navigating through menus extensively, so a responsive remote is crucial.
Keep it beside you so you don’t lose momentum during the calibration process.
• A Comfortable Viewing Position
Sit in your usual watching spot while making these adjustments.
The picture can look different from various angles and distances.
Being in your normal position ensures the settings will be perfect for your regular viewing.
• Controlled Room Lighting
Adjust your blinds or curtains to match your typical watching conditions.
If you usually watch with lamps on, keep them on during calibration.
The goal is to match your everyday environment, not create perfect laboratory conditions.
• Familiar Video Content
Choose a movie or show you know well, preferably one with both dark and bright scenes.
Using content you’re familiar with helps you recognize when the picture improves.
Sports, nature documentaries, and recent movies all work well for testing.
• A Patience Mindset
Don’t rush through the process – good calibration takes 20-30 minutes.
You might need to go back and forth between settings to find the perfect balance.
Remember that you can always readjust later, so there’s no pressure to get it perfect immediately.
• A Smartphone or Tablet
You might want to take pictures of your original settings as a backup.
This gives you peace of mind knowing you can always return to where you started.
It’s also useful for following this guide without printing it out.
• Basic Understanding of Menus
Spend a minute familiarizing yourself with your TV’s picture settings menu.
Different brands call their settings by different names, so knowing where things are helps.
You’ll find most settings under “Picture” or “Display” in your main menu.
• Knowledge of Your Sources
Understand what devices you’re using – streaming apps, cable box, gaming console.
You might want to calibrate for your most-used source first.
Many TVs allow different settings for each input, which we’ll use to our advantage.
• An Open Mind
Be prepared to see your Perfect LED TV Picture differently than you’re used to.
The “Vivid” mode might look exciting initially, but it’s hard on the eyes long-term.
We’re aiming for natural and comfortable, which might seem unusual at first.
• A Willingness to Experiment
While we provide guidelines, every TV and room is different.
Don’t be afraid to make small adjustments based on what looks good to you.
Your personal preference is the most important factor in the end.
Finding Your TV’s Picture Settings Menu
The first practical step is locating where all the magic happens in your TV’s interface.
- You need to access the main settings area of your TV, which is usually done by pressing a dedicated button on your remote.
- You should navigate to the picture controls, which are typically found under headings like “Picture” or “Display”.
- It’s helpful to identify your TV’s specific terminology, since different manufacturers use different names for similar settings.
Navigating Different TV Brands
• Samsung TV Navigation
Press the “Home” button on your remote to bring up the smart hub.
Navigate to “Settings” (the gear icon) and select “Picture” from the menu.
You’ll find all the essential picture controls in this section, including advanced options.
• LG TV Menu Access
Press the “Settings” button on your remote (it looks like a gear).
Select “All Settings” then choose “Picture” from the options.
LG organizes settings from basic to advanced, which makes the process logical.
• Sony Television Menus
Press the “Quick Settings” or “Settings” button on your remote.
Choose “Display & Sound” then select “Picture” adjustments.
Sony often includes special presets like “Netflix Calibrated Mode” worth exploring.
• Vizio Television Interface
Press the “Menu” button on your remote controller.
Navigate to “Picture” using the arrow keys and press OK to enter.
Vizio typically groups settings into basic, advanced, and professional categories.
• TCL TV Menu System
Press the “Settings” button on your remote control.
Select “TV Settings” then choose “Picture” from the list.
TCL’s interface is usually straightforward with clear labeling of options.
• Hisense Menu Navigation
Press the “Settings” button on your remote (often a gear icon).
Select “Picture” from the main settings menu.
Hisense organizes settings similarly to other brands, making adaptation easy.
• Generic Smart TV Interfaces
Look for a “Menu” or “Settings” button on your remote.
Navigate through options until you find “Picture” or “Display” settings.
Most modern TVs follow similar patterns, so the process should feel familiar.
• Finding Advanced Settings
Often you need to enable “Expert” or “Professional” mode to access all controls.
Look for an option called “Picture Mode” and set it to “Expert” or “Custom”.
This unlocks finer controls for precise calibration beyond basic adjustments.
• Input-Specific Settings
Most TVs allow different settings for each input (HDMI 1, 2, 3 etc.).
Make sure you’re adjusting settings for the correct input you’re watching.
This lets you optimize separately for gaming consoles, streaming devices, and cable boxes.
• Saving Your Settings
Some TVs require you to save changes before exiting the menu.
Look for “Apply” or “Save” options before closing the settings.
Others save automatically as you make changes – test by changing one setting and exiting.
Choosing the Right Picture Mode
This is the most important first choice that affects all other settings.
- You need to select a starting foundation that provides the most accurate baseline for further adjustments.
- You should avoid misleading modes that prioritize store display appeal over home viewing quality.
- It’s crucial to understand what each mode does so you can make an informed decision for your viewing preferences.
Understanding Different Perfect LED TV Picture Modes
• Movie/Cinema Mode for Perfect LED TV Picture
This is almost always the most accurate starting point for home viewing.
It’s designed to reproduce colors and contrast as content creators intended.
The picture might seem warm or dim at first, but it’s actually the most natural.
• Standard/General Mode for Perfect LED TV Picture
A compromise mode that works reasonably well for various content types.
It’s brighter than Movie mode but usually less accurate with colors.
Good for daytime viewing in bright rooms where you need extra brightness.
• Vivid/Dynamic Mode for Perfect LED TV Picture
The least accurate mode that maximizes brightness and color saturation.
It’s designed to grab attention in bright store environments but strains eyes at home.
Avoid this mode for serious viewing as it crushes details and distorts colors.
• Sports Mode for Perfect LED TV Picture
Specifically tuned for sports content with enhanced motion handling.
It often increases brightness and color saturation to make players and fields pop.
Can be useful for actual sports viewing but too aggressive for other content.
• Game Mode for Perfect LED TV Picture
Reduces input lag significantly for responsive gaming.
It disables some processing features that cause delay between controller and screen.
Essential for gaming but might reduce picture quality for other content.
• Filmmaker Mode for Perfect LED TV Picture
A newer mode that disables all post-processing for pure content.
It turns off motion smoothing and preserves the original aspect ratios.
Excellent for movie purists who want exactly what the director intended.
• Custom/User Mode for Perfect LED TV Picture
Allows you to create and save your own perfect settings.
Once you’ve calibrated other modes, you can save them as custom presets.
Great for having different optimizations for day and night viewing.
• ISF Modes for Perfect LED TV Picture
Professional calibration modes found on higher-end television models.
They provide extremely accurate starting points for professional calibrators.
If available, these are excellent foundations for further adjustment.
• HDR Modes for Perfect LED TV Picture
These activate automatically when playing HDR content from compatible sources.
They maximize brightness and color range for high dynamic range content.
Usually you can’t manually select these – they engage automatically with HDR signals.
• Dolby Vision Modes for Perfect LED TV Picture
Similar to HDR modes but specifically for Dolby Vision content.
They provide optimized settings for this premium HDR format.
Like HDR modes, they typically activate automatically with compatible content.
Adjusting Basic Picture Settings for Perfect LED TV Picture
Now we get to the heart of calibration – fine-tuning the core controls.
- You need to adjust settings in the correct order because some changes affect how others appear.
- You should make incremental changes rather than large jumps to find the sweet spot gradually.
- It’s important to use appropriate test content that helps you evaluate each adjustment accurately.
The Essential Settings Sequence
• Backlight Control for Perfect LED TV Picture
This controls the intensity of the LED lights behind your screen – not to be confused with “Brightness”.
Set it based on your room lighting – higher for bright rooms, lower for dark rooms.
In a dark room, start around 30-40; in a bright room, try 60-80 as a starting point.
• Brightness Setting for Perfect LED TV Picture
Despite its name, this primarily controls black levels and shadow details in dark scenes.
Find a dark movie scene and increase until you see details in shadows, then back off slightly.
Setting it too high makes blacks look gray; too low loses detail in dark areas.
• Contrast Adjustment for Perfect LED TV Picture
This controls the intensity of white levels and overall image pop.
Increase until bright areas are vivid but not washed out, then reduce if you lose detail.
Proper contrast makes the image have depth without causing eye strain from excessive brightness.
• Sharpness Control for Perfect LED TV Picture
This is the most misunderstood setting – it doesn’t actually create real detail.
Most modern content looks best with sharpness set very low, often between 0-15.
High sharpness adds artificial edge enhancement that actually reduces real detail.
• Color/Saturation for Perfect LED TV Picture
Controls the intensity or vividness of colors in the picture.
Adjust until colors look rich but natural – skin tones shouldn’t look sunburned.
Oversaturated colors look cartoonish, while undersaturated looks dull and washed out.
• Tint/Hue for Perfect LED TV Picture
Adjusts the balance between red and green tones in the image.
Most content is properly balanced, so this usually stays at the default or neutral position.
Only adjust if skin tones look noticeably too red or too green.
• Color Temperature for Perfect LED TV Picture
Controls whether the image appears warmer (reddish) or cooler (bluish).
“Warm” settings are more accurate and comfortable for viewing; “Cool” looks artificial.
Start with “Warm” or “Warm2” – it might seem yellow at first but you’ll adjust quickly.
• Motion Smoothing for Perfect LED TV Picture
This creates artificial frames between real ones to reduce blur – the “soap opera effect”.
For film content, turn this off completely for a cinematic look.
For sports, you might prefer it on low to reduce blur in fast action.
• Noise Reduction for Perfect LED TV Picture
Attempts to clean up grain and artifacts in lower-quality content.
For HD and 4K content, turn this off as it can remove fine detail.
Only use for poor-quality streams or old standard definition content.
• Local Dimming for Perfect LED TV Picture
If your TV has this feature, it improves contrast by dimming backlights in dark areas.
In a dark room, set this to medium or high for better black levels.
In a bright room, low settings often work better as high can cause noticeable fluctuations.
Advanced Settings for Perfect Picture
Once the basics are dialed in, these advanced controls can refine your picture further.
- You should approach these settings carefully as they have subtler effects that are easy to over-adjust.
- It’s helpful to understand what each advanced control does before making changes.
- You might need to experiment with different content to see the effects of these adjustments clearly.
Fine-Tuning for Perfect LED TV Picture
• Gamma Adjustment
Controls the brightness relationship between dark, medium, and bright areas.
2.2 is standard for most viewing environments and a good starting point.
Lower gamma (2.0-2.1) makes the image brighter; higher (2.3-2.4) increases contrast in dark rooms.
• Color Space
Determines the range of colors your TV can display – like a digital color palette.
“Auto” usually works best, allowing the TV to select the appropriate space automatically.
“Native” might look more vibrant but less accurate – stick with “Auto” for most content.
• Black Level
Controls the range of dark shades – sometimes called “HDMI Black Level”.
“Low” or “Normal” typically works for video content from streaming devices and cable boxes.
“High” or “Extended” might be needed for PC connections – mismatch causes crushed blacks or washed-out image.
• Contrast Enhancer
Attempts to dynamically adjust contrast based on content – often called “Dynamic Contrast”.
For accurate viewing, turn this off as it constantly changes the image based on content.
If you prefer more “pop”, low settings can work, but it sacrifices accuracy.
• Color Enhancer
Similar to contrast enhancer but for colors – it saturates certain hues dynamically.
For accurate colors, keep this disabled as it overemphasizes certain color ranges.
If you prefer vibrant colors, low settings might be acceptable but know it reduces accuracy.
• Super Resolution
Attempts to enhance detail in lower-resolution content through processing.
For HD and 4K content, turn this off as it can create artificial edges and noise.
Only useful for improving standard definition content from older sources.
• Film Mode
Specifically for detecting and properly displaying 24fps film content from movies.
Set this to “Auto” if available to ensure proper cadence for film-based content.
This reduces judder in film pans without creating the soap opera effect.
• LED Clear Motion
Uses backlight scanning to reduce motion blur – different from motion smoothing.
This doesn’t create artificial frames but can cause slight flickering at lower settings.
Use sparingly and only if you notice significant motion blur in fast content.
• Auto Brightness Control
Sometimes called “Ambient Light Sensor” – adjusts backlight based on room lighting.
For consistent calibration, turn this off as it constantly changes your careful settings.
If you want automatic adjustments for day/night viewing, you can enable it.
• Color Management System
Advanced control for fine-tuning individual color hues and saturation.
Unless you have professional calibration tools, avoid these settings.
Incorrect adjustment here can seriously damage color accuracy in hard-to-fix ways.
Optimal Settings for Different Content
Your perfect settings might vary depending on what you’re watching and when.
- You should create different profiles for different types of content and viewing conditions.
- It’s useful to understand why settings need adjustment for various scenarios.
- Modern TVs allow you to save multiple configurations so you don’t have to readjust constantly.
Tailoring Settings to Your Viewing
• Movie Watching at Night
Use your calibrated “Movie” mode with local dimming on medium or high.
Keep motion smoothing completely off for authentic cinematic presentation.
Lower the backlight to comfortable levels for dark room viewing – usually 20-40.
• Sports Viewing
You might prefer “Standard” mode with slightly higher color saturation for vibrant uniforms.
Moderate motion smoothing can help with fast action – try low or medium settings.
Increase backlight to overcome daytime lighting or window glare – 60-80 range.
• Gaming Sessions
Always use “Game” mode to minimize input lag, regardless of other considerations.
You might prefer slightly cooler color temperature for more vibrant game worlds.
Adjust backlight based on room lighting, but avoid extreme levels to prevent eye strain.
• Daytime Viewing
Increase backlight significantly to overcome ambient light – often 70-100%.
You might need slightly higher contrast and color settings to compensate for washout from light.
Consider enabling local dimming on low to maintain contrast without noticeable fluctuations.
• News and Talk Shows
Accuracy matters less, so comfort settings work well – slightly warmer color temperature.
You might reduce sharpness slightly as it can enhance compression artifacts in talking heads.
Moderate backlight levels work well – 40-60 depending on room lighting.
• Animation Viewing
Often benefits from slightly increased color saturation for vibrant cartoon worlds.
You can use slightly higher sharpness settings as animation responds well to it.
Motion smoothing is less problematic but still best kept off for original artistic intent.
• HDR Content Viewing
These settings usually engage automatically when HDR content is detected.
You’ll typically see much higher peak brightness and expanded color range.
Most basic settings are locked in HDR mode, focusing mainly on backlight adjustment.
• Dolby Vision Content
The premium version of HDR with even more precise metadata for each scene.
Like HDR, settings engage automatically when Dolby Vision content is played.
Often provides the most stunning picture your TV is capable of producing.
• Streaming vs Broadcast
Streaming services often have better compression than cable/satellite broadcasts.
You might use slightly higher sharpness and noise reduction for broadcast content.
Streaming usually allows your calibrated settings to shine without compromise.
• Creating Multiple Profiles
Most modern TVs allow you to save settings to different picture mode slots.
Create a “Day” profile with higher backlight and a “Night” profile with lower backlight.
Some TVs even allow different settings per input, perfect for separate gaming optimization.
Conclusion: Enjoy Your Perfect LED TV Picture
You’ve now transformed your TV from a generic display into a personalized viewing station tailored to your eyes, your room, and your content.
- Remember that these settings are starting points – your personal preference is the final judge of what looks best.
- Don’t be afraid to make small adjustments as you watch different content and as your room lighting changes throughout the day.
- Your eyes will adapt to the more natural picture within a few days, and then you’ll truly appreciate the improvement.
The difference between out-of-the-box settings and a properly calibrated picture is genuinely transformative. You’ll see details in shadows and highlights you never noticed, colors will look natural rather than artificial, and your viewing will become more comfortable and immersive. Most importantly, you’ll finally be seeing content the way creators intended. Now grab your remote, find your favorite movie, and experience the stunning difference for yourself!
For most viewing, “Movie” or “Cinema” mode provides the most accurate and natural picture. These modes are designed to reproduce colors and contrast as content creators intended. While they might seem warm or dim at first, they’re actually the most comfortable for extended viewing.
We recommend avoiding Vivid/Dynamic modes for regular viewing. These settings maximize brightness and saturation to stand out in stores but appear artificial at home. They often crush detail in bright and dark areas and can cause eye strain during longer viewing sessions.
This is usually caused by incorrect brightness settings or insufficient local dimming. Adjust brightness using a dark movie scene until you see shadow details without making blacks look gray. If your TV has local dimming, set it to medium or high for better black levels in dark rooms.
The soap opera effect is that unnaturally smooth look that makes films resemble cheap TV shows. It’s caused by motion smoothing features. To remove it, find “Motion Smoothing,” “TruMotion,” or “Motion Flow” in your settings and turn it off completely for film content.
Use “Warm” color temperature instead of “Cool,” lower backlight in dark rooms, and turn off motion smoothing. Ensure your room has some ambient light rather than watching in complete darkness. These adjustments make extended viewing much more comfortable for your eyes.
This is usually caused by incorrect color temperature or oversaturated colors. Switch from “Cool” to “Warm” color temperature and reduce color saturation until skin tones look natural. Also make sure you’re not in “Vivid” mode, which often oversaturates reds and oranges.
For consistent picture quality, we recommend turning off energy saving modes. These features automatically adjust your screen brightness based on room light, which ruins picture consistency. They cause the image to constantly change brightness, making accurate calibration impossible.
For most users, a one-time calibration is sufficient unless you change your room’s lighting significantly. TVs generally maintain their calibration for years. If you move the TV to a different room or change your lighting furniture, you might want to readjust your settings.
For standard 4K HDR content, any certified “High-Speed” HDMI cable provides identical picture quality. You only need “Ultra High-Speed” cables for advanced features like 8K or 4K at 120Hz. Expensive cables don’t improve picture quality beyond certified standards.
Store displays use maximum “Vivid” settings in bright lighting to grab attention, which isn’t suitable for home viewing. Your home environment has different lighting and viewing distances. Our calibration process optimizes your TV for your specific home environment rather than a store floor.


- Be Respectful
- Stay Relevant
- Stay Positive
- True Feedback
- Encourage Discussion
- Avoid Spamming
- No Fake News
- Don't Copy-Paste
- No Personal Attacks
- Be Respectful
- Stay Relevant
- Stay Positive
- True Feedback
- Encourage Discussion
- Avoid Spamming
- No Fake News
- Don't Copy-Paste
- No Personal Attacks
