LED Screen Configuration: 5 Steps to Perfect Setup
Published: 30 Jun 2025
LED Screen Configuration : 5 Expert Steps to Flawless Setup
Did you know that 80% of LED screen glitches—flickering, color mismatches, or blurry text—stem from incorrect LED Screen Configuration? Unlike plug-and-play TVs, LED screens demand precise tuning to unlock their full potential. Think of LED Screen Configuration as the “brain surgery” for your display: skip one step, and the entire visual experience suffers. Ready to transform chaotic pixels into crystal-clear brilliance? Let’s dive in!
Understanding LED Screen Configuration
Configuration adjusts hardware/software settings.
It ensures sharp images, accurate colors, and smooth motion.
Ignore it, and your screen underperforms.
Proper setup prevents 90% of common issues.
Example: A stadium screen showed blurry replays until refresh rate was fixed!
Core Components You MUST Configure
- Resolution: Match content resolution to screen pixels (e.g., 1920×1080 for Full HD).
- Brightness (Nits): Outdoors need 5000+ nits; indoors use 800-1500.
- Refresh Rate: 60Hz for static content; 3840Hz for sports (eliminates motion blur).
- Color Temperature: 6500K for true whites; 9300K for cooler tones.
- Pixel Pitch: P1.2 for close viewing; P10 for billboards.
- Aspect Ratio: 16:9 for videos; 4:3 for data dashboards.
- Input Lag: Gaming? Set to <20ms response time.
- Calibration Tools: Use NovaLCT or LEDStudio for guided setup.
- Content Mapping: Divide screen into zones for multi-video layouts.
- Power Sequencing: Turn on processor first, then screen (prevents surges!).
- Signal Type: HDMI for <50ft; fiber optic for long distances.
- Pro Tip: Save profiles for different events (e.g., “Concert Mode” vs. “Corporate PPT”).
Step-by-Step LED Screen Configuration Guide
Follow this foolproof 5-step process.To read more about led click here.
No tech degree required!
Flawless Setup in 30 Minutes
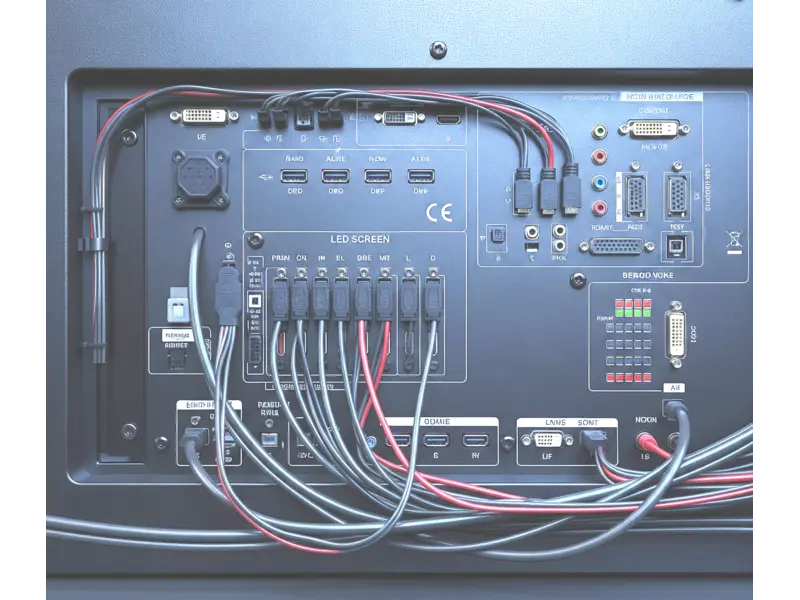
- Hardware Check: Connect video source (PC/media player) to processor via HDMI/SDI.
- Software Installation: Download manufacturer’s config tool (e.g., NovaLCT).
- Basic Settings: Set resolution, brightness, and color space (sRGB/REC.709).
- Advanced Tweaks: Adjust gamma (2.2 standard), hue, and saturation.
- Testing: Display color bars and grayscale patterns to spot issues.
- Content Alignment: Use grid overlays to correct stretching/cropping.
- Refresh Rate Sync: Match content FPS to screen Hz (e.g., 60fps → 60Hz).
- Real Example: A restaurant menu screen had crooked text—grid alignment fixed it!
- Safety: Use surge protectors and secure cables with velcro straps.
- Backup: Save settings to USB drive for quick recovery.
- Troubleshooting: Run diagnostic scans for dead pixels or color shifts.
- Final Check: View content from audience sightlines to confirm clarity.
Avoiding Common in LED Screen Configuration Mistakes
Small errors cause big problems.
Dodge these pitfalls!
Top 12 Costly Errors & Fixes
- Flickering Screens: Caused by mismatched refresh rates. Fix: Sync content FPS to screen Hz.
- Color Mismatch: Different screens show different reds. Fix: Use color calibration tools.
- Blurry Text: Incorrect resolution scaling. Fix: Set native resolution only.
- Overheating: Blocked vents or high brightness. Fix: Add cooling fans and clean monthly.
- Signal Drops: Loose cables or outdated firmware. Fix: Secure connections and update software.
- Example: A conference screen crashed mid-presentation—firmware update prevented repeats.
- DIY Fix Kit: Keep spare cables, thermal paste, and a USB config backup onsite.
- Prevention: Schedule weekly 10-minute diagnostic checks.
- Never Do: Force cables into ports—bent pins cost $200+ to replace!
- Cable Rules: HDMI for <50ft; SDI for long runs; fiber optic for 300+ ft.
- Voltage Check: Ensure power matches screen specs (110V vs. 220V).
- Pro Trick: Label all cables and ports (“Input A,” “Power Out”) to avoid confusion.
Your Foolproof 5-Step Configuration Checklist
Follow this beginner-friendly process to ensure you miss nothing.
You can complete a basic setup in under 30 minutes.
This method prevents the most common and frustrating errors.
A Methodical Approach to Perfect Setup
Final Walk-Through: View the screen from all intended audience angles to ensure consistency in brightness and color.
Step 1: Hardware & Connection Audit: Physically check all cables from your video source (PC, Blu-ray player) to the video processor, and from the processor to the first display cabinet. Ensure HDMI, DP, or SDI cables are firmly seated and undamaged.
Step 2: Software Installation & Discovery: Install the configuration software provided by your LED display manufacturer. Open the program and let it “scan” or “discover” the connected hardware. It should automatically find your receiver card(s).
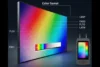
Step 3: The Big Three – Resolution, Brightness, Color: In the software, first set the physical resolution of your wall. Then, dial in the brightness appropriate for your lighting conditions. Finally, load a test image and adjust the Red, Green, and Blue values until whites look pure and colors look natural.
Step 4: Content Testing & Alignment: Display a variety of test content: a color bar pattern, high-motion video, and a detailed static image. Look for any color blotches, motion blur, or aliasing (jagged lines on text). Use the software’s alignment grid to correct any crooked tiles.
Step 5: Save, Schedule, and Secure: Once perfect, save your configuration file to the processor and also export a backup to a USB drive. If your software supports it, set a simple schedule (e.g., turn on at 8 AM, off at 10 PM). Secure all cables with velcro straps to prevent accidental disconnection.
Connection Tip: For long cable runs (over 50 feet), use fiber optic HDMI or SDI cables to avoid signal degradation that causes sparkles and dropouts.
Example: A retail store’s promo video was cut off at the edges. Using the software’s “display area” setting, they shrunk the output canvas to fit perfectly within the physical screen.
Calibration Aid: Use free online test patterns (like the Lagom LCD test) to help accurately set contrast, sharpness, and grayscale levels.
Troubleshooting First Step: If the screen is blank, always check that the correct input source is selected on the video processor itself.
Documentation: Take a screenshot of your final software settings. This is invaluable for troubleshooting or replicating the setup later.
| Advanced Check: |
|---|
Run a “diagnostic” or “test” mode from the software to check for dead or stuck pixels across the entire display. |
Advanced LED Screen Configuration for Pro Results
Unlock next-level performance with LED Screen Configuration.
Impress even expert audiences!
Expert-Only Tweaks
- HDR Enable: Requires 10-bit color depth and DCI-P3 gamut.
- Content Scheduling: Auto-switch ads by time/day (e.g., lunch menus at 11 AM).
- Motion Sensors: Dim screens when no one is nearby (saves 30% energy!).
- Remote Management: Control screens via apps (e.g., Samsung MagicInfo).
- Edge Blending: Seamlessly merge multiple screens for giant displays.
- Pixel Shift: Extend LED life by rotating pixel usage monthly.
- Layer Effects: Overlay transparent videos on live feeds.
- Example: A concert used edge blending for a 100ft curved backdrop.
- Gaming Mode: Enable <5ms input lag for interactive displays.
- Color LUTs: Load custom color lookup tables for artistic effects.
- API Integration: Connect to data sources (weather, social media feeds).
- Future-Proof: Choose processors with 8K support even for 4K screens.
The Non-Negotiable Settings for Every Screen
- Resolution Mapping: This is the most critical step. You must tell the screen controller the exact number of pixels in your display wall (e.g., 1920 wide x 1080 high). A mismatch causes stretching, cropping, or a black screen.
- Brightness & Contrast Calibration: Indoor boards (800-1,500 nits) need less power than sun-drenched outdoor signs (5,000+ nits). Proper contrast makes images pop without crushing black details.
- Color Temperature & Gamma: Adjust the white point (e.g., 6500K for a standard daylight look) and gamma curve (often 2.2) to ensure colors are accurate and consistent across the entire screen.
- Refresh Rate Optimization for LED Screen Configuration: A higher refresh rate (e.g., 3840Hz) eliminates flickering in video recordings and is essential for smooth motion in sports broadcasts. 60Hz is fine for static images.
- Pixel Pitch Consideration for LED Screen Configuration: While a physical trait, your configuration must account for it. A small pixel pitch (P1.2) allows for intricate detail close-up, while a larger pitch (P10) is configured for maximum impact at a distance.
- Aspect Ratio Lock: Force your content source to match the screen’s native ratio (e.g., 16:9) to prevent distorted, stretched, or pillar-boxed images.
- Input Lag Reduction: For interactive or gaming displays, enable a “Game Mode” or low-latency setting in the processor to ensure touch or controller response is instantaneous.
- Real-World Example: A museum’s interactive timeline looked blurry because the media player was outputting 1080p to a 4K native screen. Setting the output to 4K resolved it instantly.
- Pro Tip for LED Screen Configuration: Before any event, create and save multiple configuration profiles (e.g., “Bright Day,” “Dim Night,” “Presentation Mode”) for one-click switching.
- Safety Check LED Screen Configuration : Always follow the correct power sequencing: turn on the video source and processor first, then the LED display. Reverse the order when powering down.
- Tool Recommendation for LED Screen Configuration: Most manufacturers provide free software like NovaStar’s NovaLCT or Colorlight’s LEDStudio. These are essential for advanced LED Screen Configuration.
- Avoid This Mistake in LED Screen Configuration: Never assume “factory default” settings are optimal for your environment. They are almost always a generic starting point.
Conclusion
Mastering LED screen configuration banishes glitches and unleashes stunning visuals. From basic brightness tuning to advanced HDR setup, every step matters. Start tonight: calibrate one screen using our 5-step guide. Your content—and audience—will leap to life! Transform chaos into clarity—your perfect display awaits
10 FAQs About LED Screen Configuration
Yes, but only basic settings (brightness/contrast). Software unlocks resolution mapping and scheduling. Free tools like LED Player work for beginners.
Check cable connections first. Then verify source output (HDMI/DP). Update graphics drivers—solves 90% of issues!
Indoor screens: Every 6 months. Outdoor: Every 3 months (sun/heat shifts colors). Use built-in sensors for accuracy.
Yes! Over-brightness burns LEDs. Wrong voltage fries processors. Always match specs and use surge protectors.
From P1.2 to P2.5 for <10ft distances. P4+ for billboards. Mismatch causes blurry or pixelated content.
Save profiles to USB. Load onto each screen’s processor. Sync via network tools like NovaLCT for uniformity.
Ambient light affects perception. Enable auto-brightness or create “Night Mode” profiles with warmer tones.
Avoid them! They add lag. Connect media players directly to LED processors for instant response.
HDMI 2.0 for <50ft. SDI for long runs. Fiber optic for 300+ ft. Never use VGA—it degrades quality!
Manufacturer workshops (free!). YouTube channels like LED Screen Tech. Practice with virtual simulators first!


- Be Respectful
- Stay Relevant
- Stay Positive
- True Feedback
- Encourage Discussion
- Avoid Spamming
- No Fake News
- Don't Copy-Paste
- No Personal Attacks
- Be Respectful
- Stay Relevant
- Stay Positive
- True Feedback
- Encourage Discussion
- Avoid Spamming
- No Fake News
- Don't Copy-Paste
- No Personal Attacks
